When you create a scheduled task in MPM, you need to tell Micronet how often and on what dates the task should be performed.
To create scheduled dates for a task:
Refer to "Plant Update - Schedule".
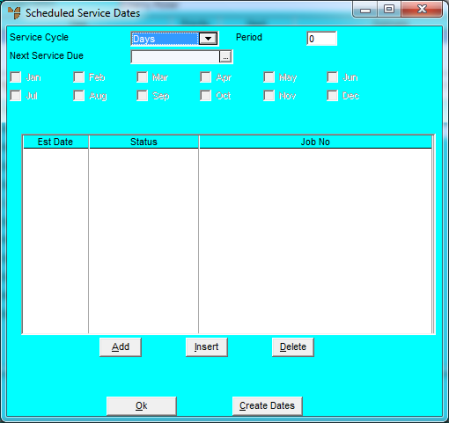
Micronet displays the Scheduled Service Dates screen.

|
|
Field |
Value |
|
|
Service Cycle |
Select a service cycle. The options are:
|
|
|
Period |
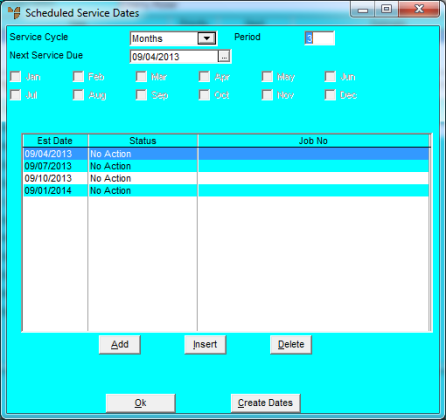
Enter the number of Service Cycle types between each scheduled service date. For example, if the plant scheduled task is for one year and you select a Service Cycle of Months with a Period of 3 (i.e. every three months), Micronet creates four Scheduled Service Dates for the year. |
|
|
Next Service Due |
Enter or select the first occurrence or scheduled service date. |
|
|
[Months] |
If you selected Selected Months in the Service Cycle field, check the box for each month in which the scheduled task is to be performed. |
Micronet creates the scheduled service dates and lists them on the Scheduled Service Dates screen.

|
|
|
Technical Tip Micronet updates the Job No for each service date when scheduled job cards are created. |
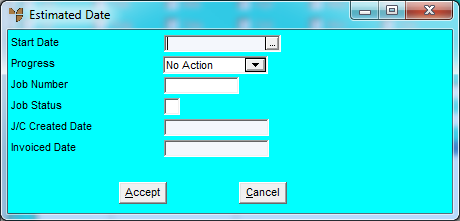
If you selected to add, insert or edit a service date, Micronet displays the Estimated Date screen.

|
|
Field |
Value |
|
|
Start Date |
Enter or select the new service date. This is the only field you can edit on this screen. Micronet updates the remaining fields when the job card is created. |
|
|
Progress |
Micronet displays the job progress. |
|
|
Job Number |
Micronet displays the job number. |
|
|
Job Status |
Micronet displays the job status. |
|
|
J/C Created Date |
Micronet displays the date the job was created. |
|
|
Invoiced Date |
Micronet displays the date the job was invoiced. |
If you selected to add a service date, Micronet redisplays the Estimated Date screen so you can add further service dates.
Micronet redisplays the Scheduled Service Dates screen showing all the service dates added.
Micronet redisplays the Plant Scheduled Task screen.
If you selected to add a scheduled task, Micronet redisplays the Plant Scheduled Task screen so you can add further scheduled tasks.
Micronet redisplays the Plant Update screen - Schedule tab. Refer to "Plant Update - Schedule" for information on using that screen.